Step 1: Scan the QR Code
Make sure your device is connected to a stable internet connection (WIFI/4G/5G)
Open Settings → Cellular (or Mobile Service)
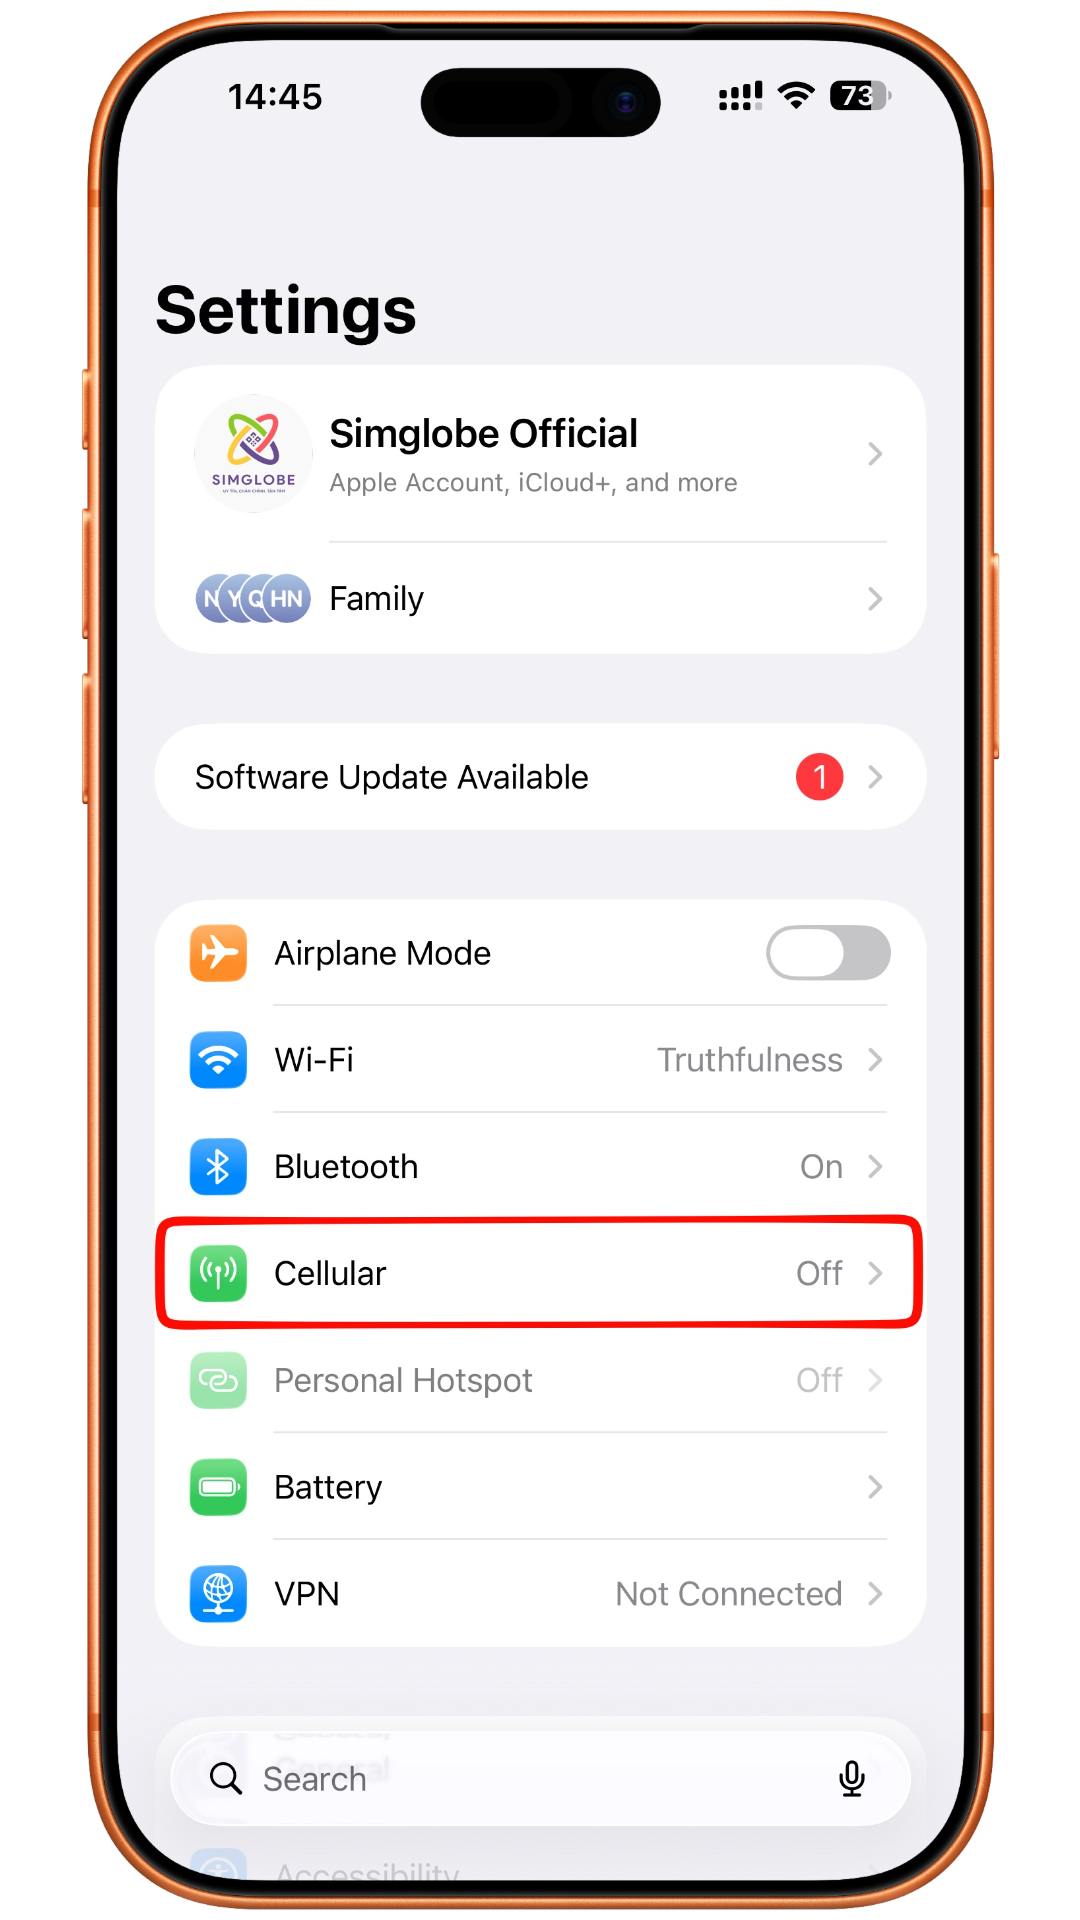
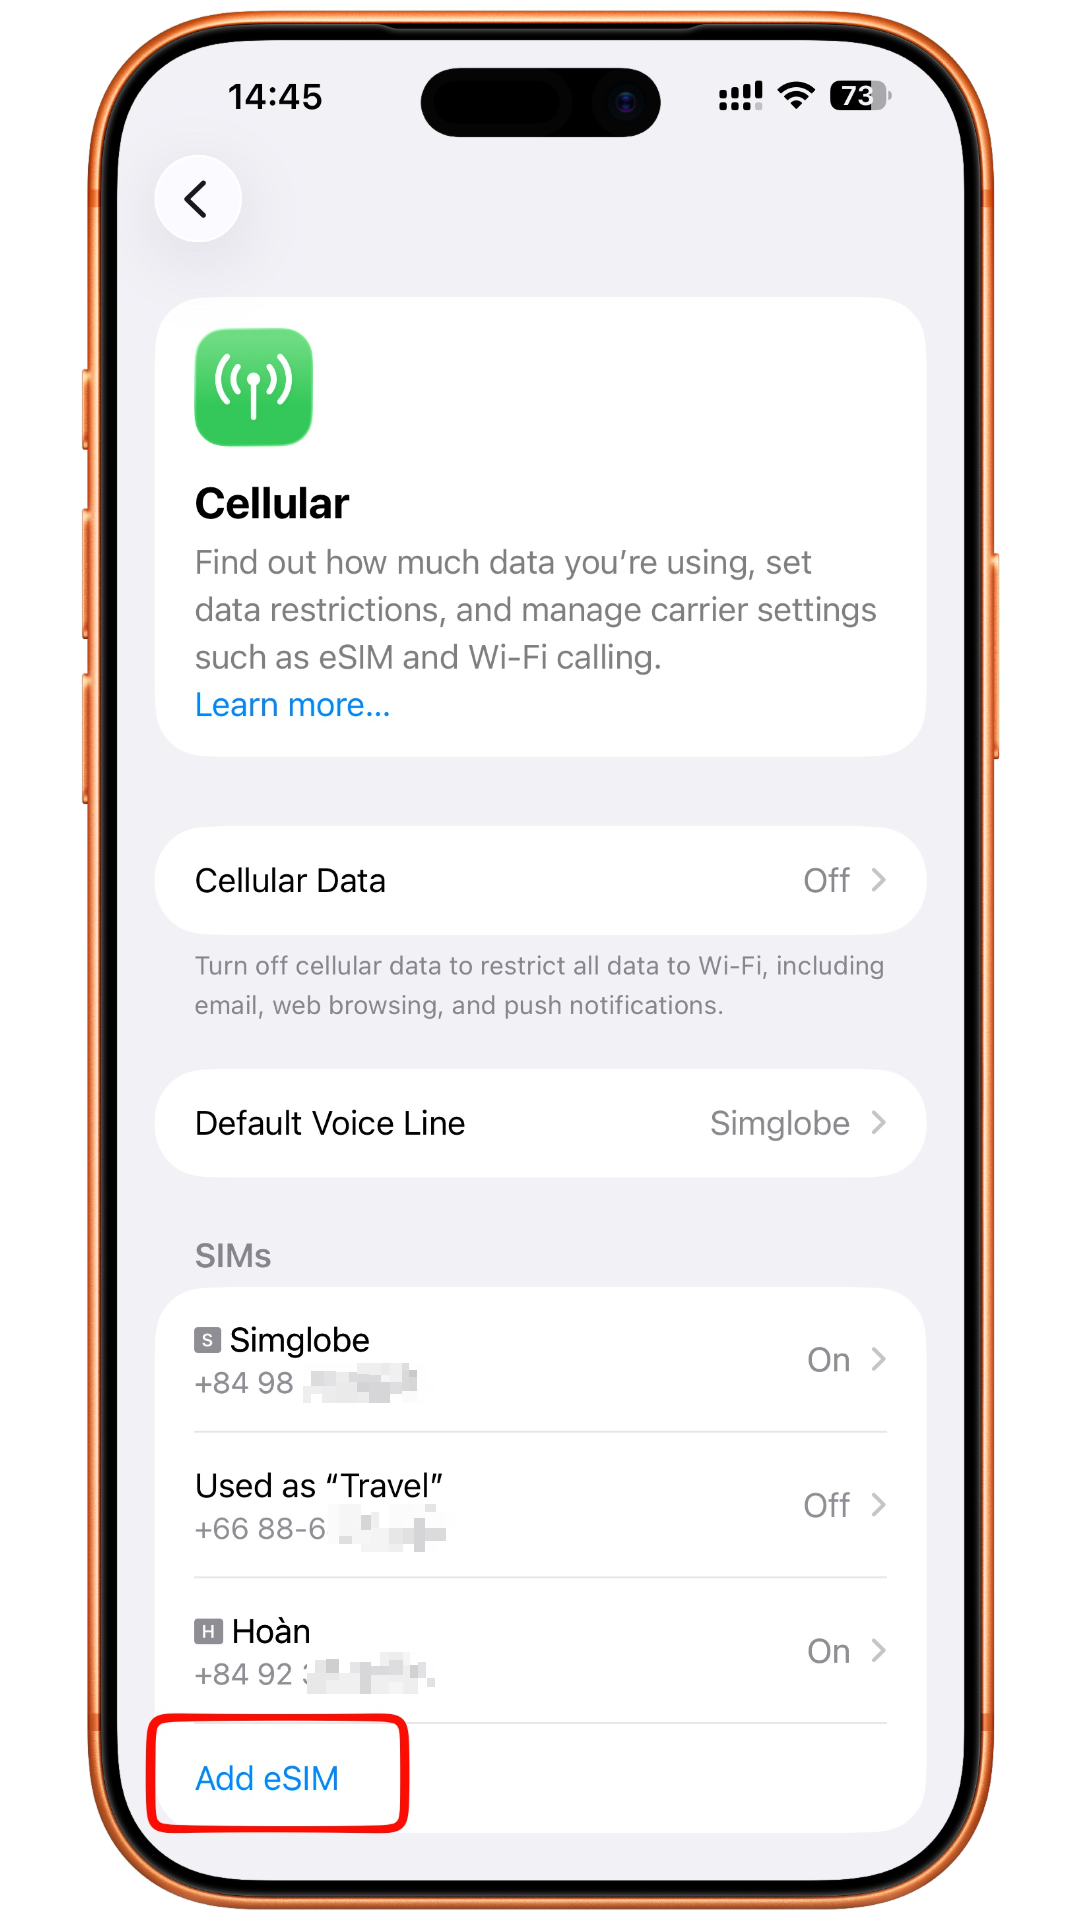
Tap Add eSIM
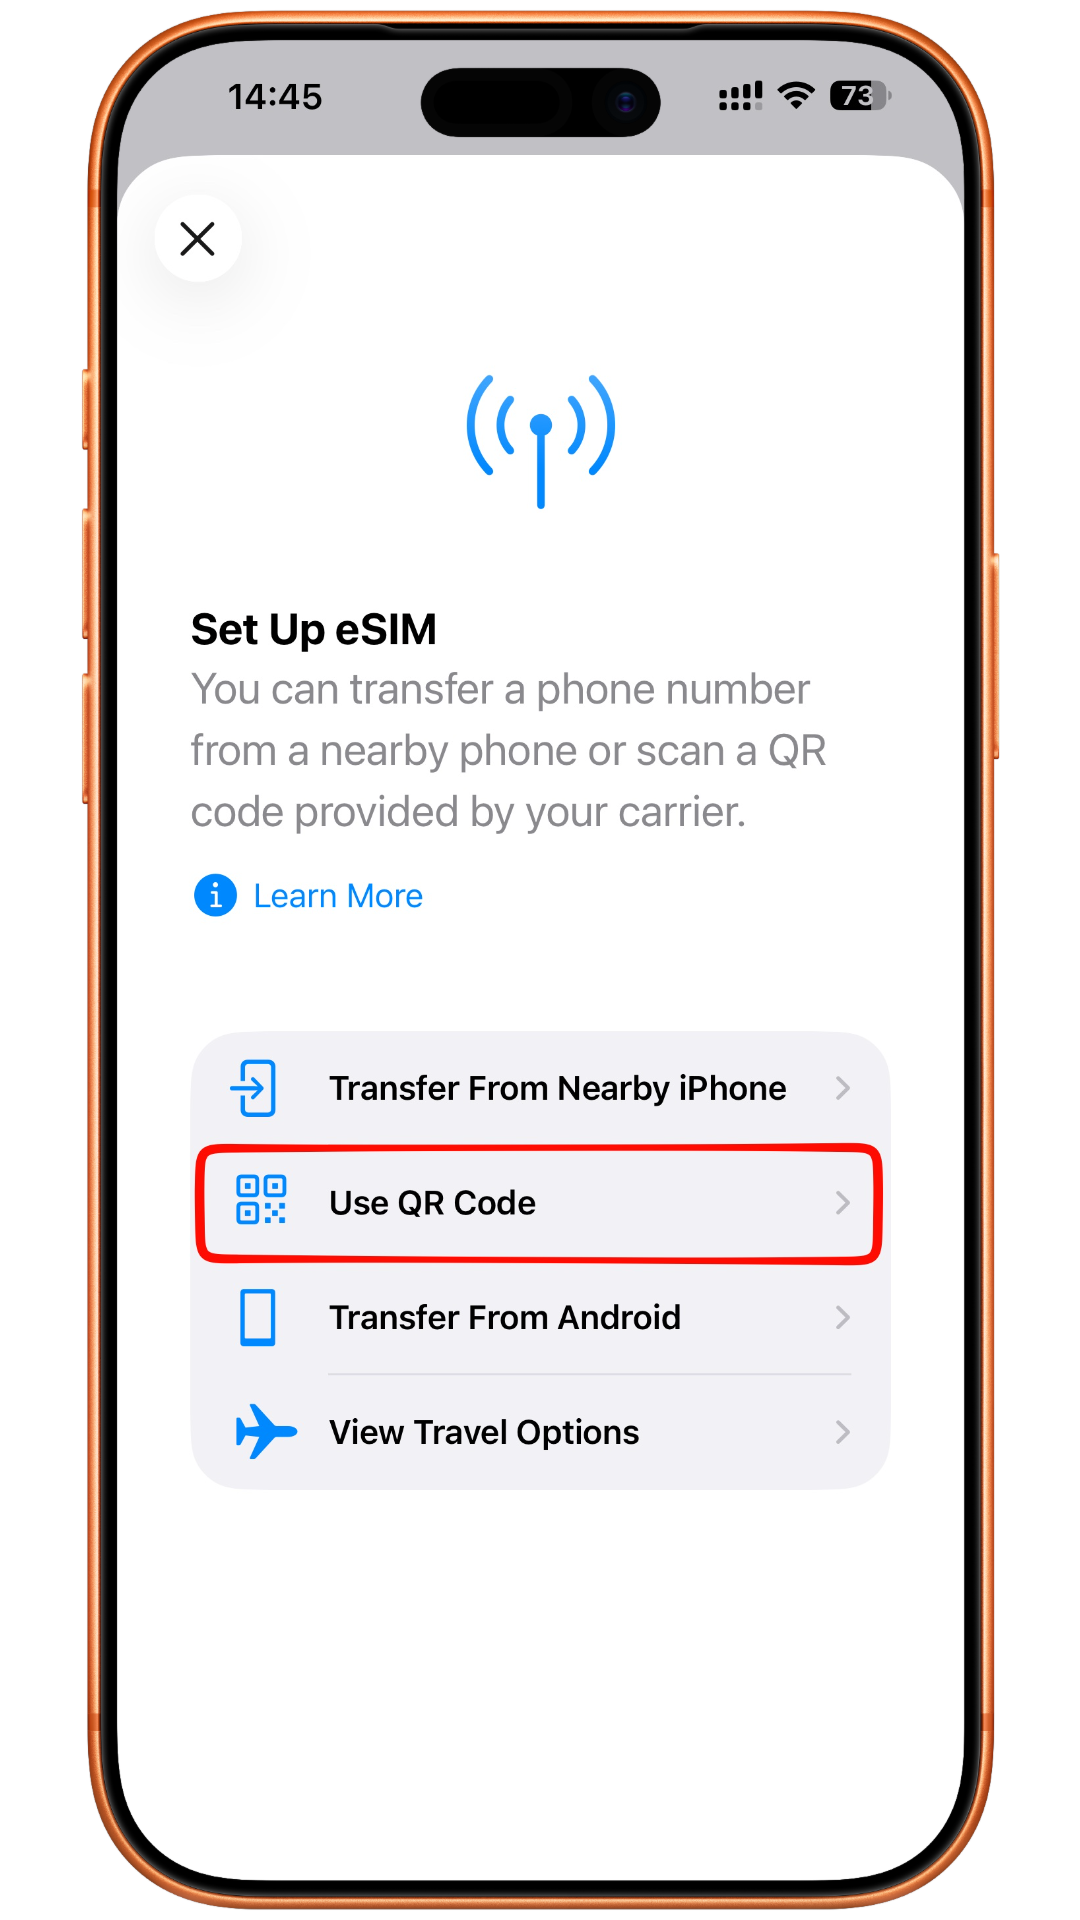
Use QR Code
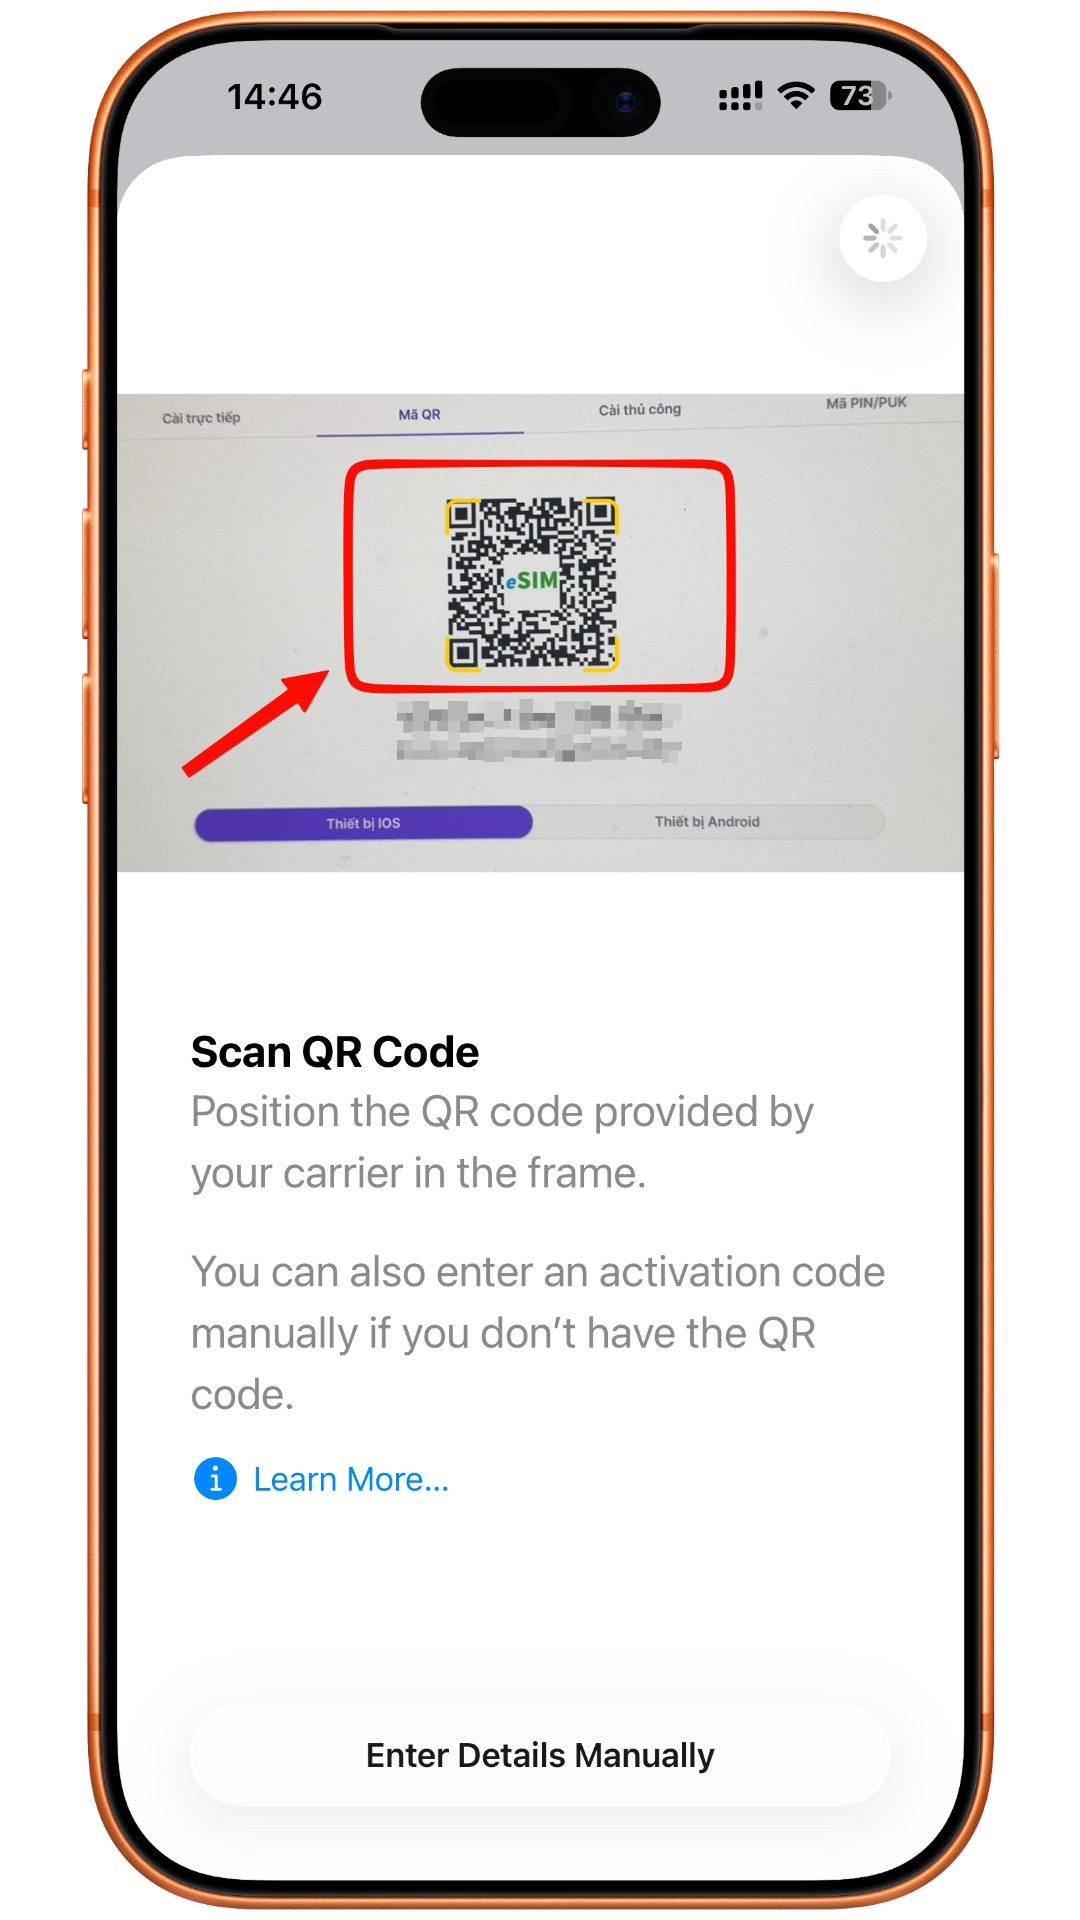
Scan QR Code
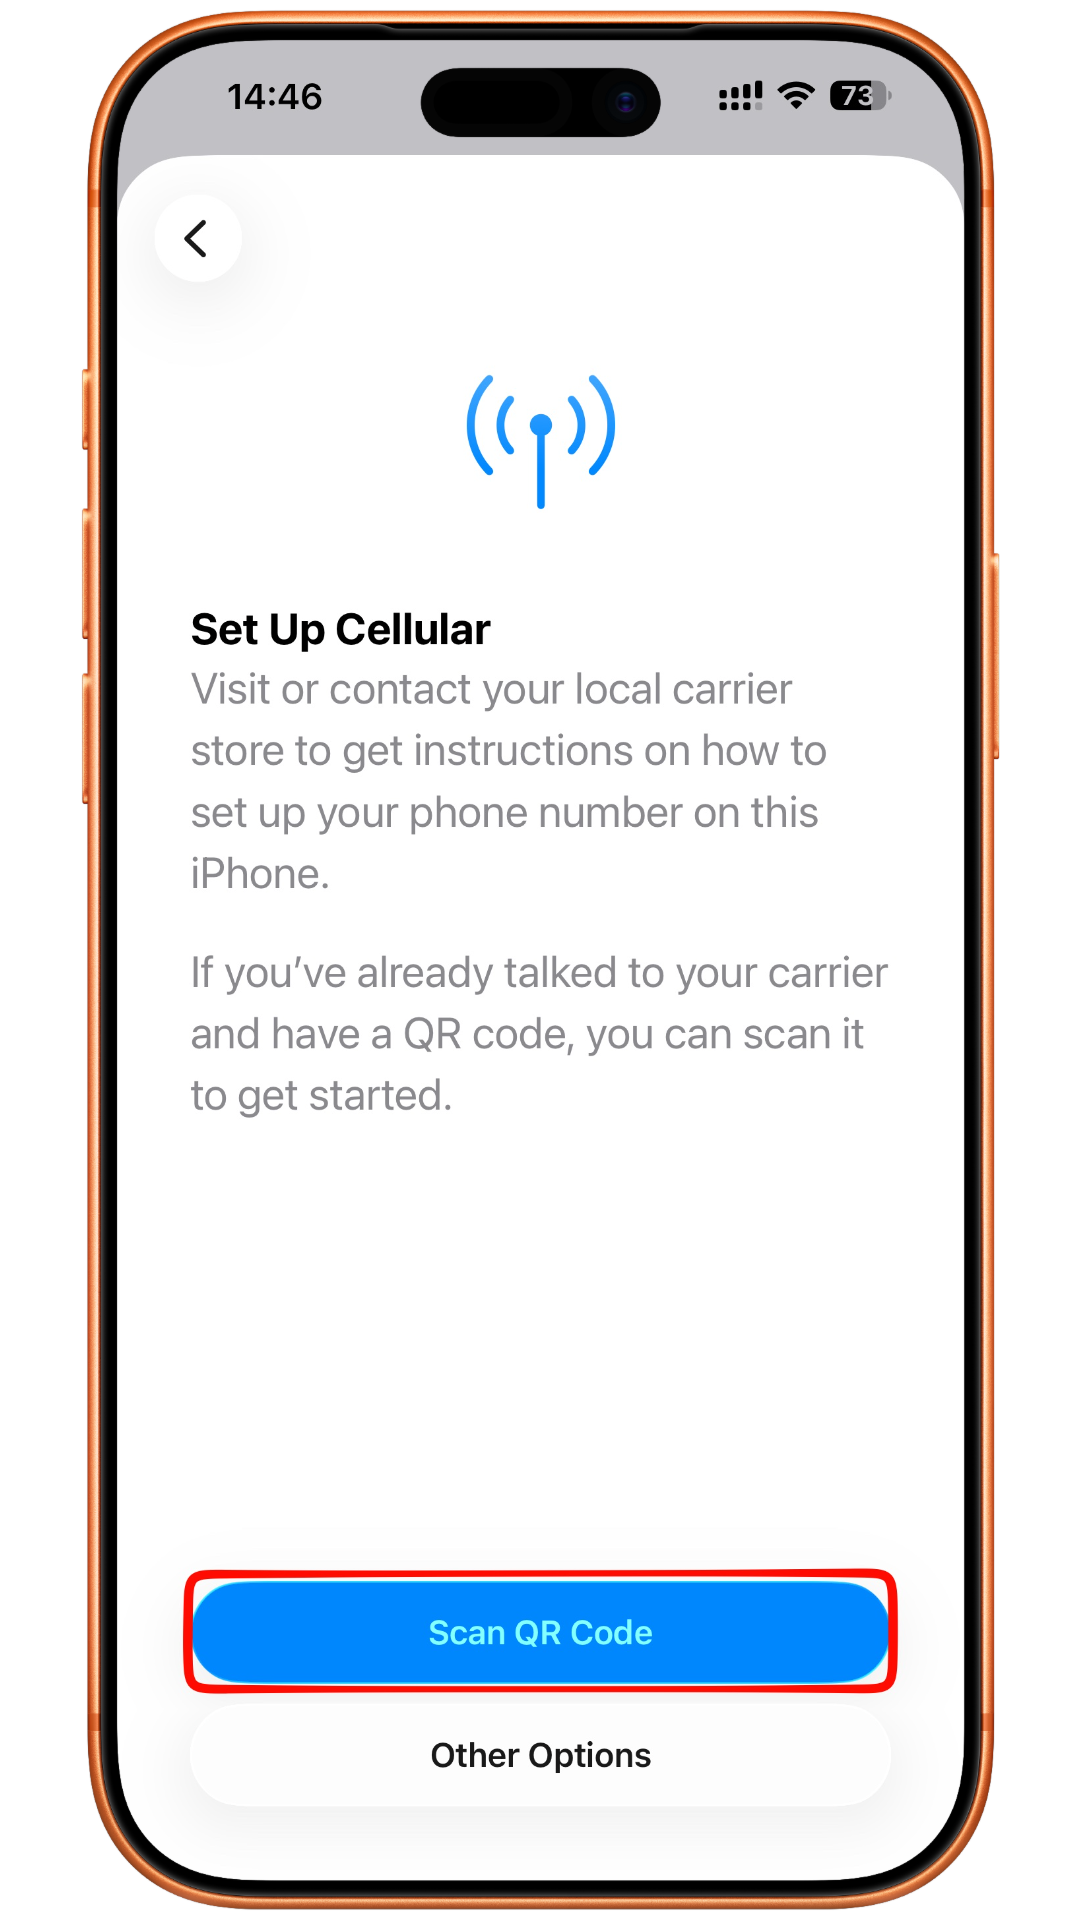
Scan the eSIM QR code provided above
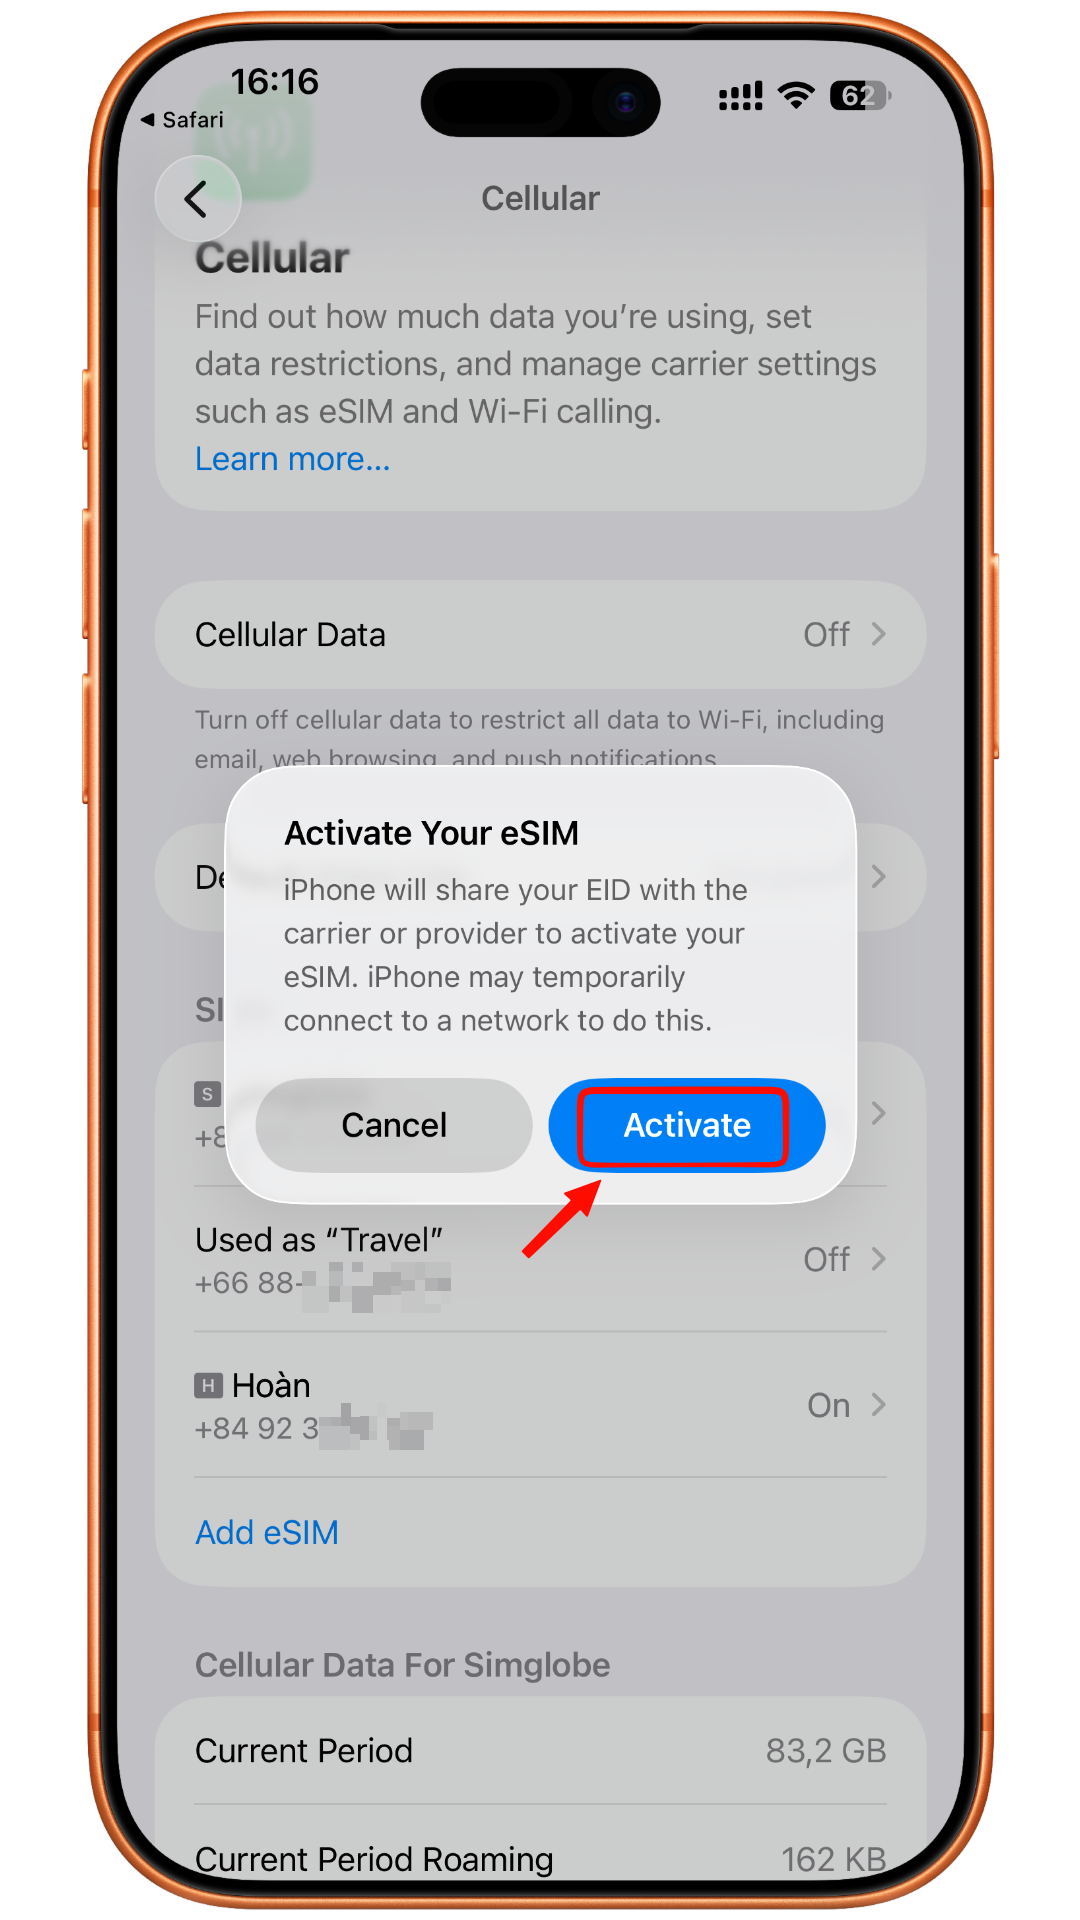
Step 2: Install the eSIM
Select Activate
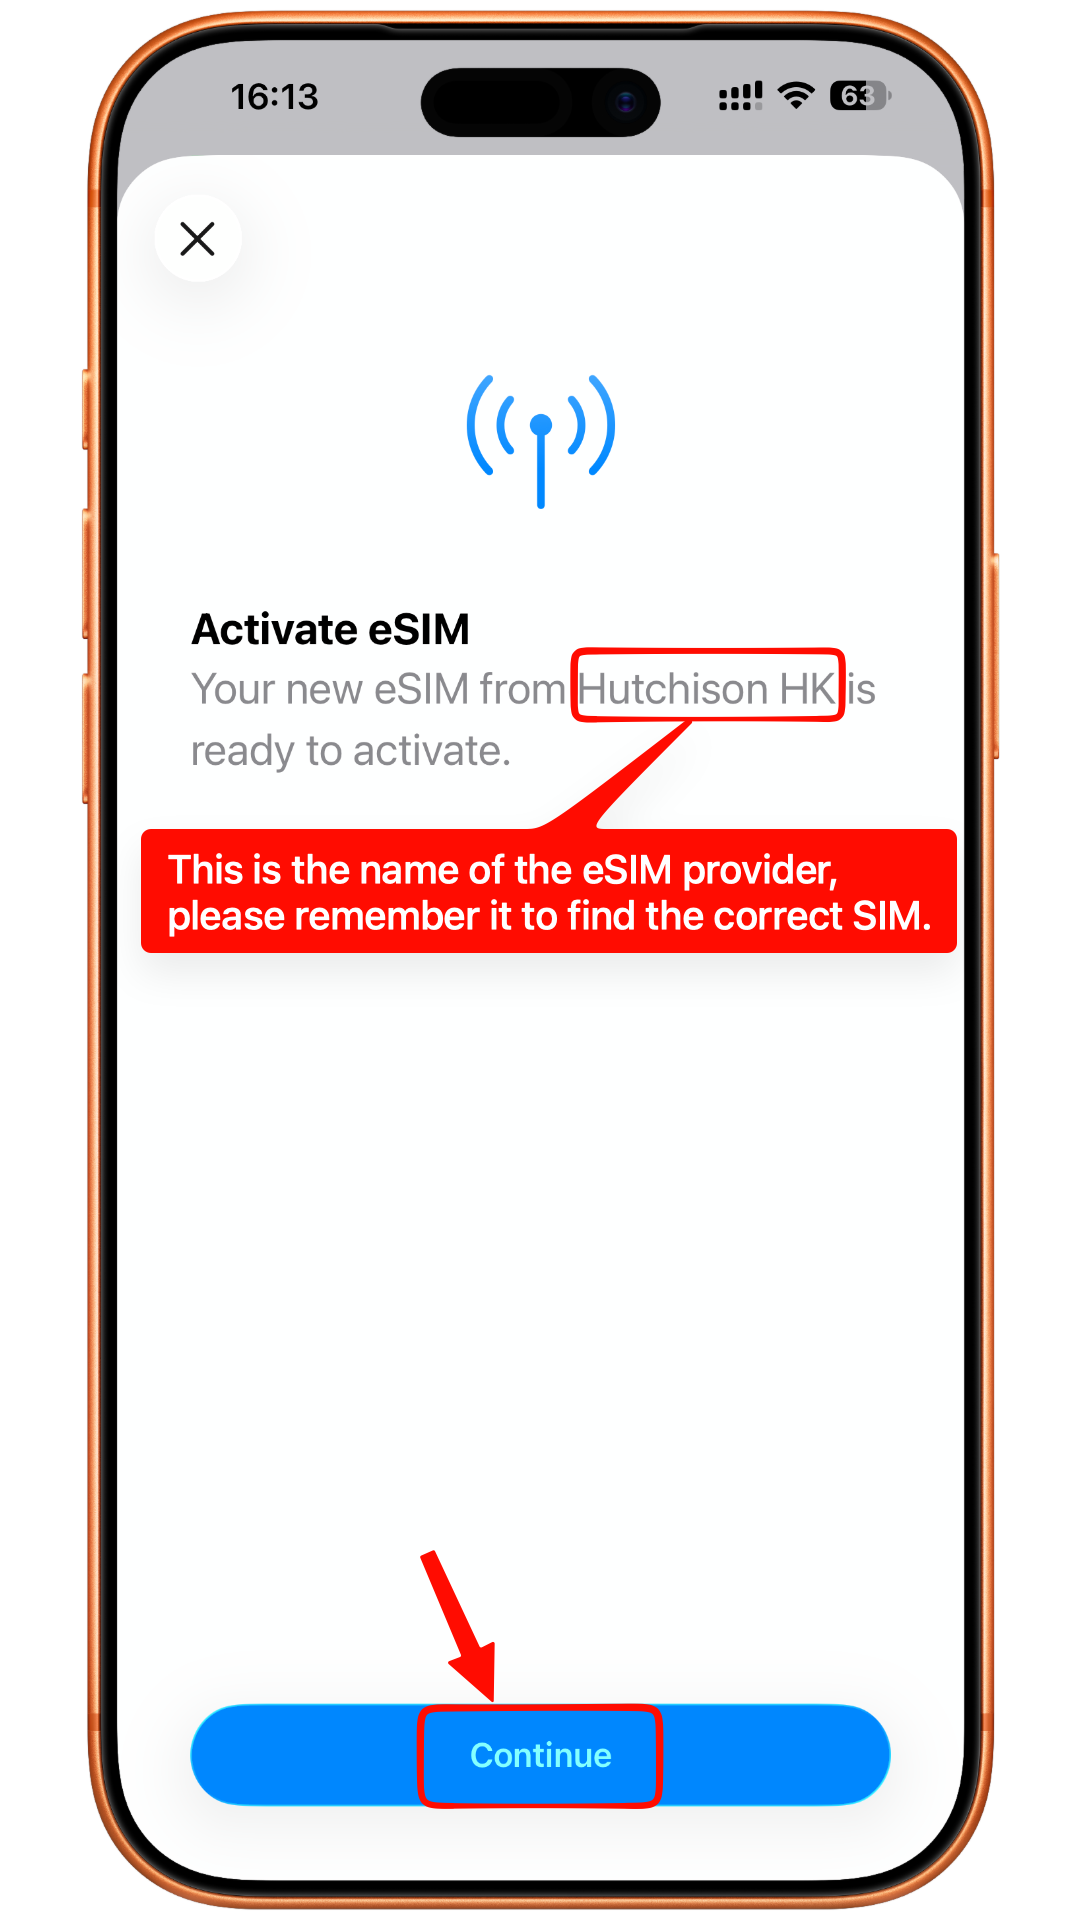
Continue
Data Only
(Select this option if your plan only includes Data. Some plans also support voice calls; in that case, please select Voice & Data. Don’t worry if you choose the wrong option, you can change it later.)

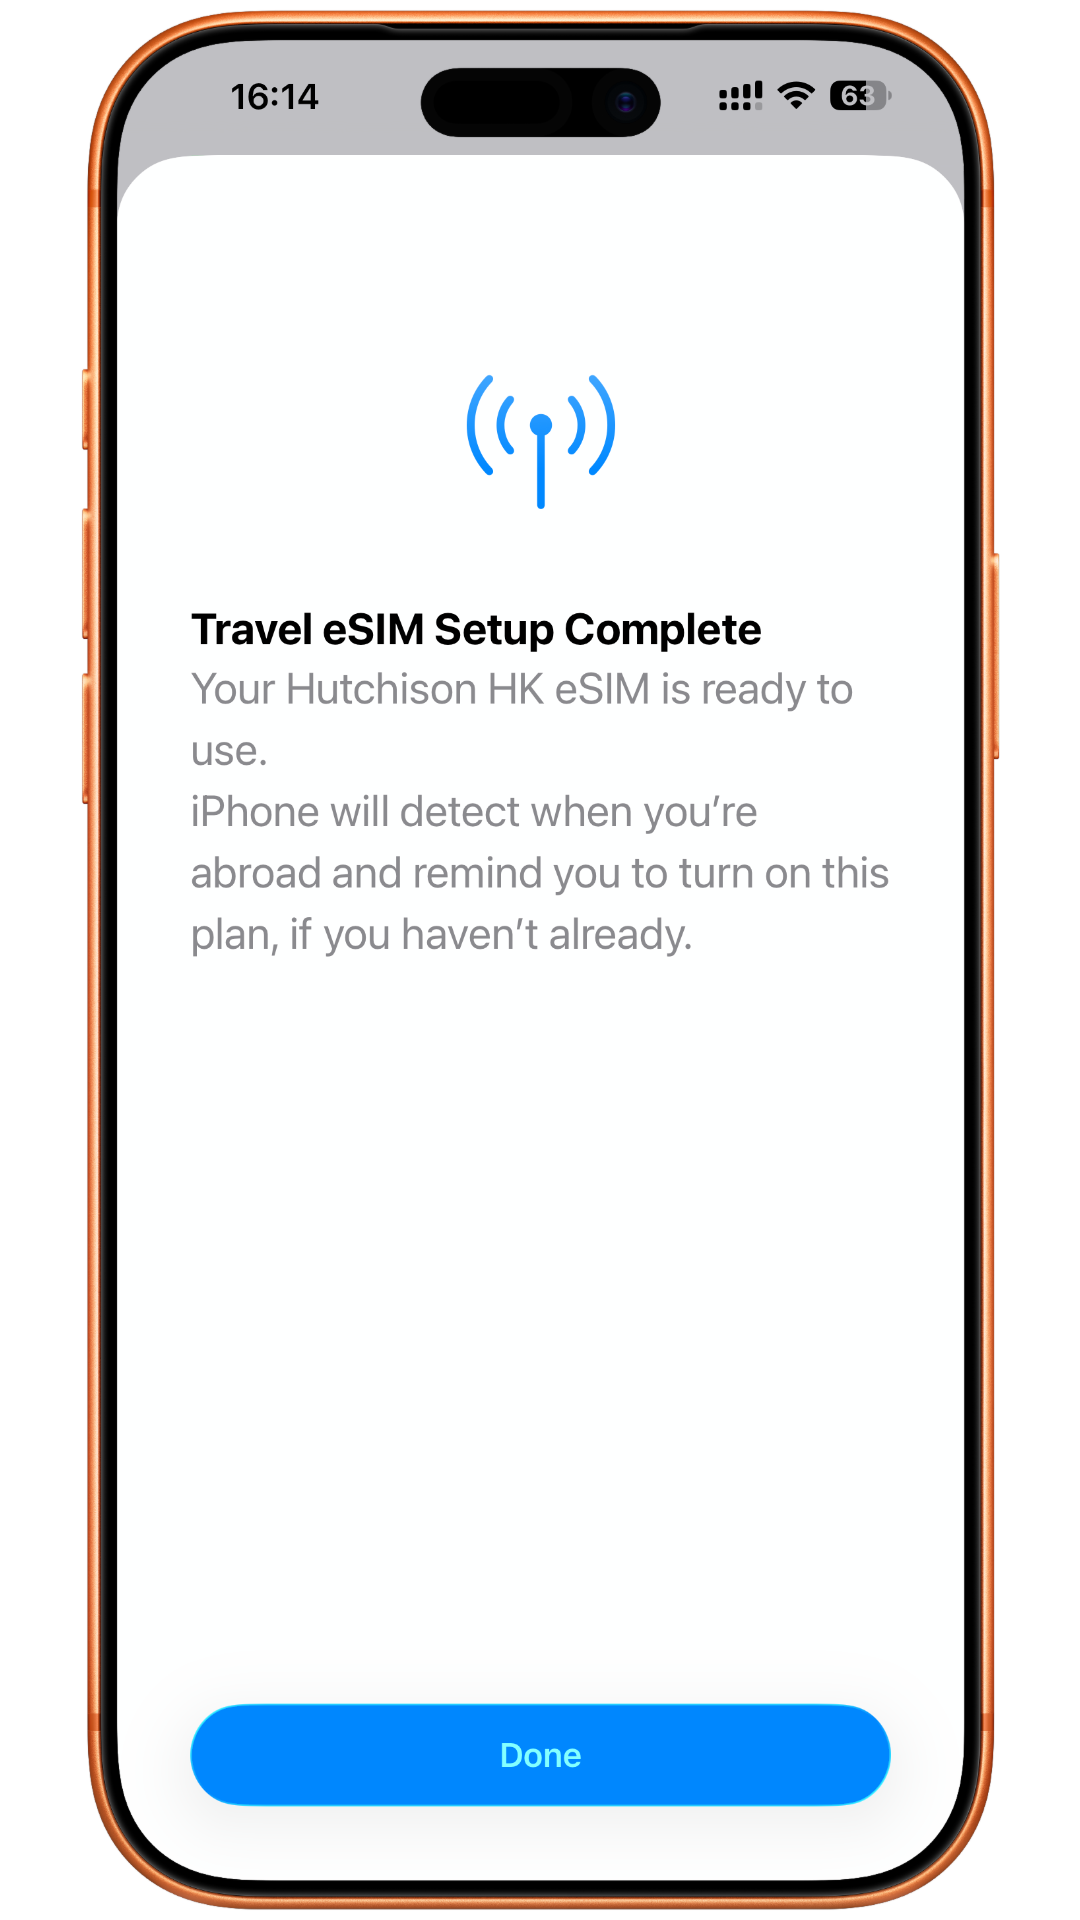
Done
Step 3: Configure the eSIM
In Settings → Cellular (or Mobile Service),
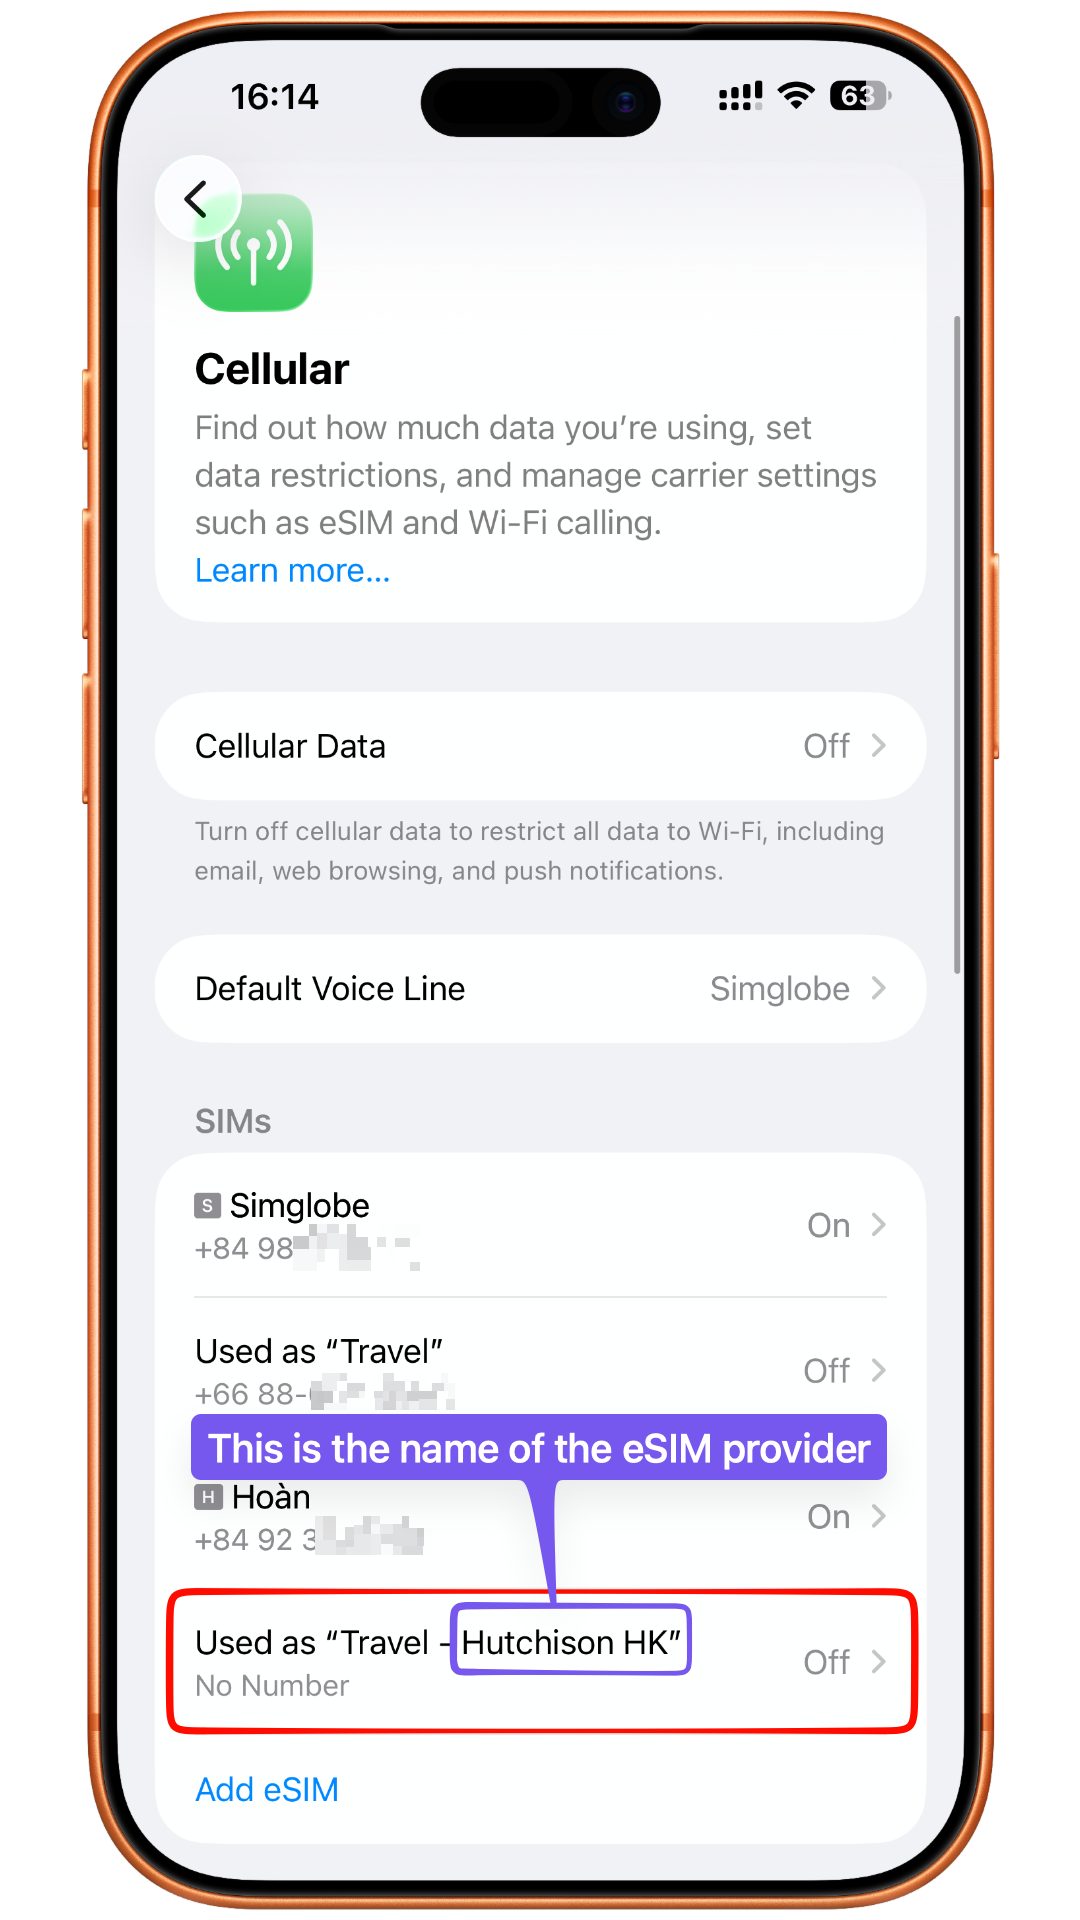
You will see a new eSIM added at the bottom position (above any eSIMs marked No SIM)
For some eSIMs, installation can be completed in advance while still in Vietnam (this will be stated in the instructions). In this case, you may keep the eSIM turned OFF and continue the setup steps below after arriving at your travel destination.
This process does not require an internet connection.
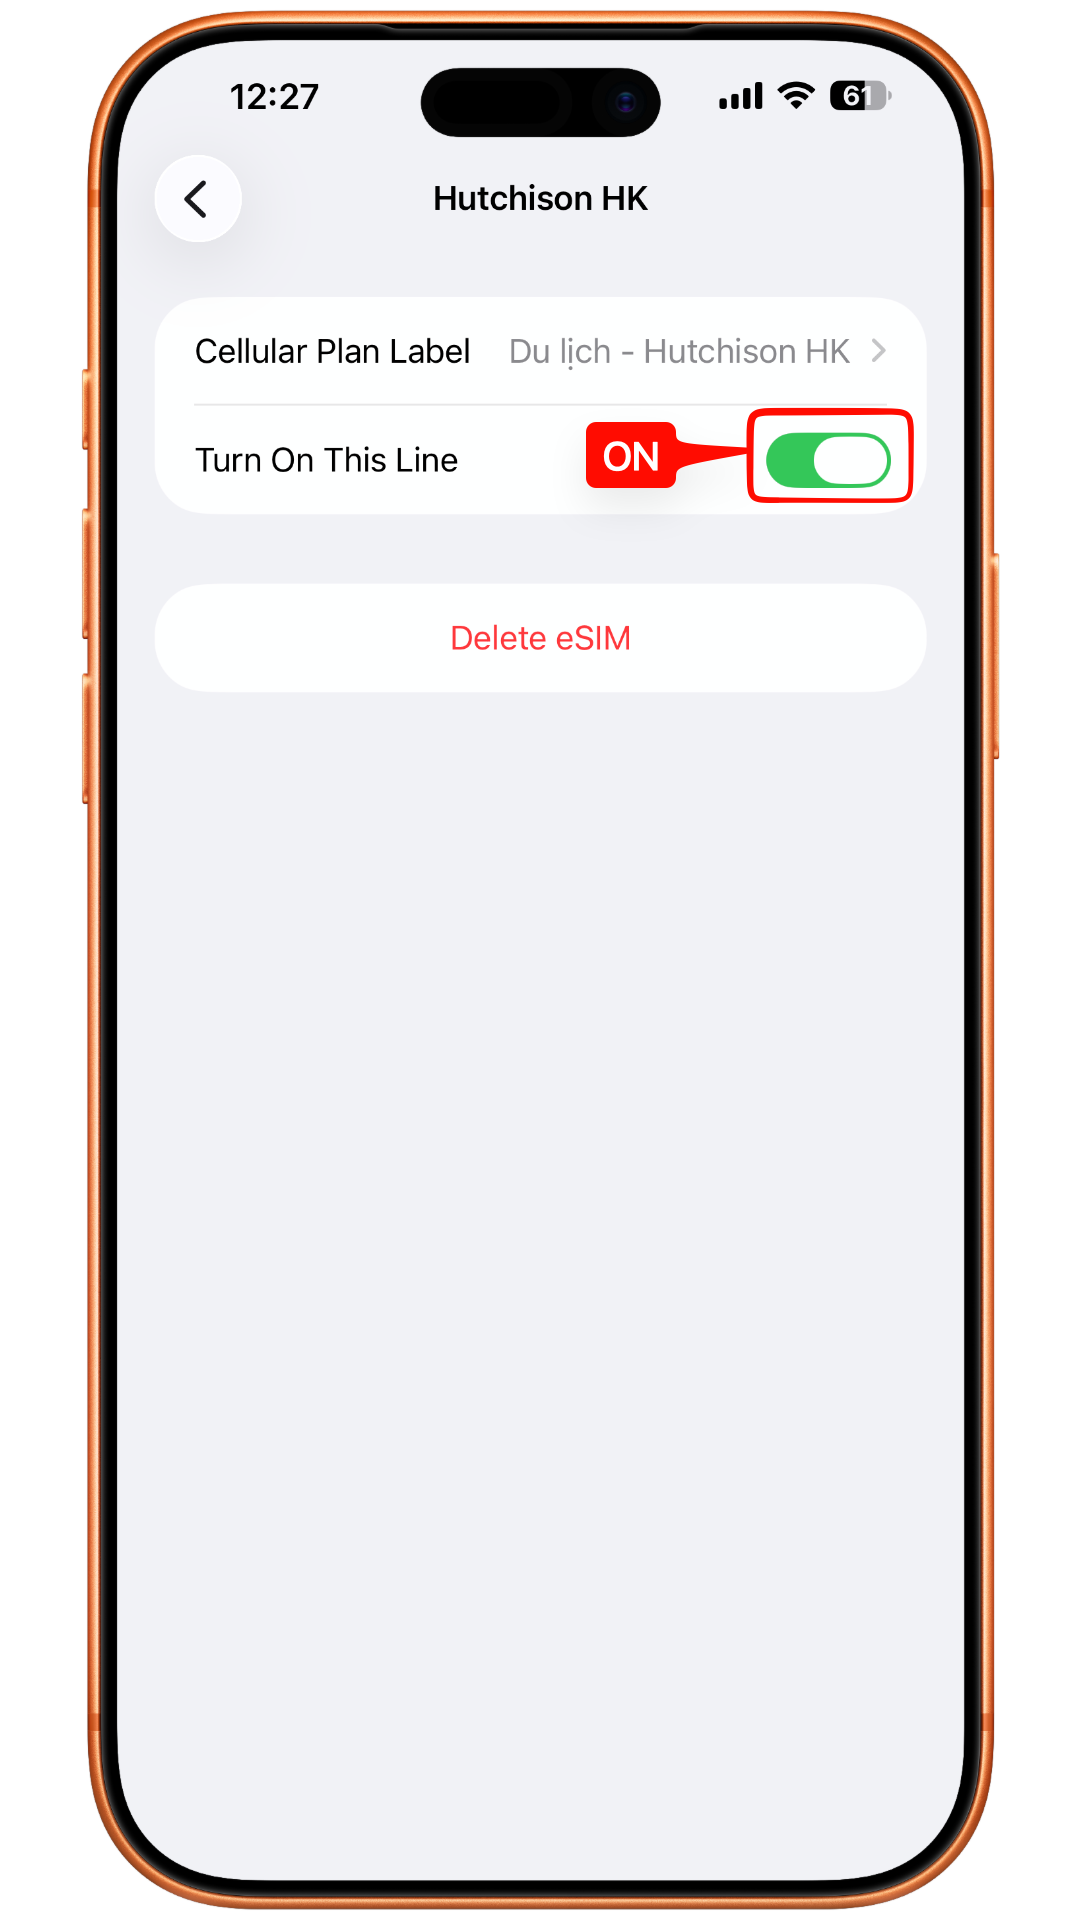
Select the eSIM (in this example, it is “Travel – Hutchison HK”)
The eSIM may be ON or OFF. If it is currently OFF, please turn it ON
(If you already have 2 active SIMs/eSIMs, your phone may ask you to temporarily disable one SIM/eSIM in order to enable the new eSIM)
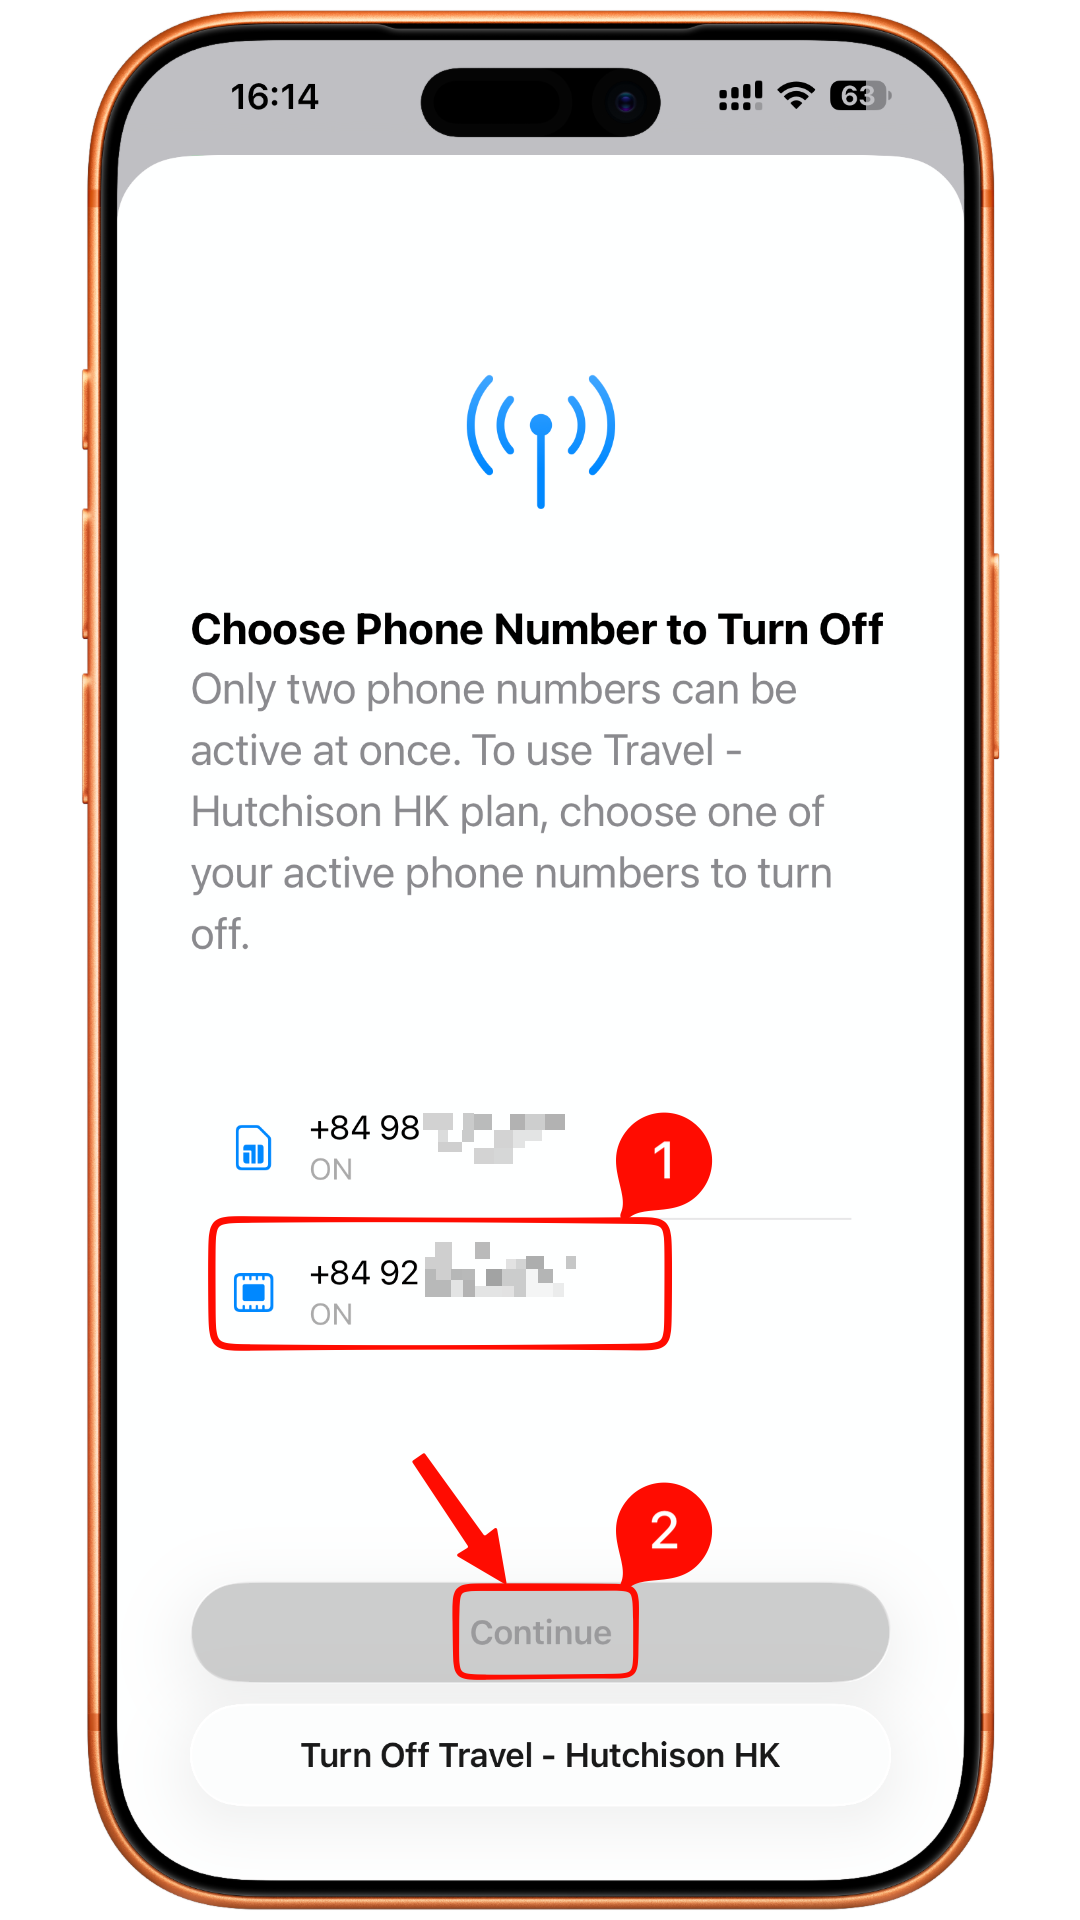
(After enabling the eSIM, please go back one step and reopen this screen so that all available settings can appear correctly)
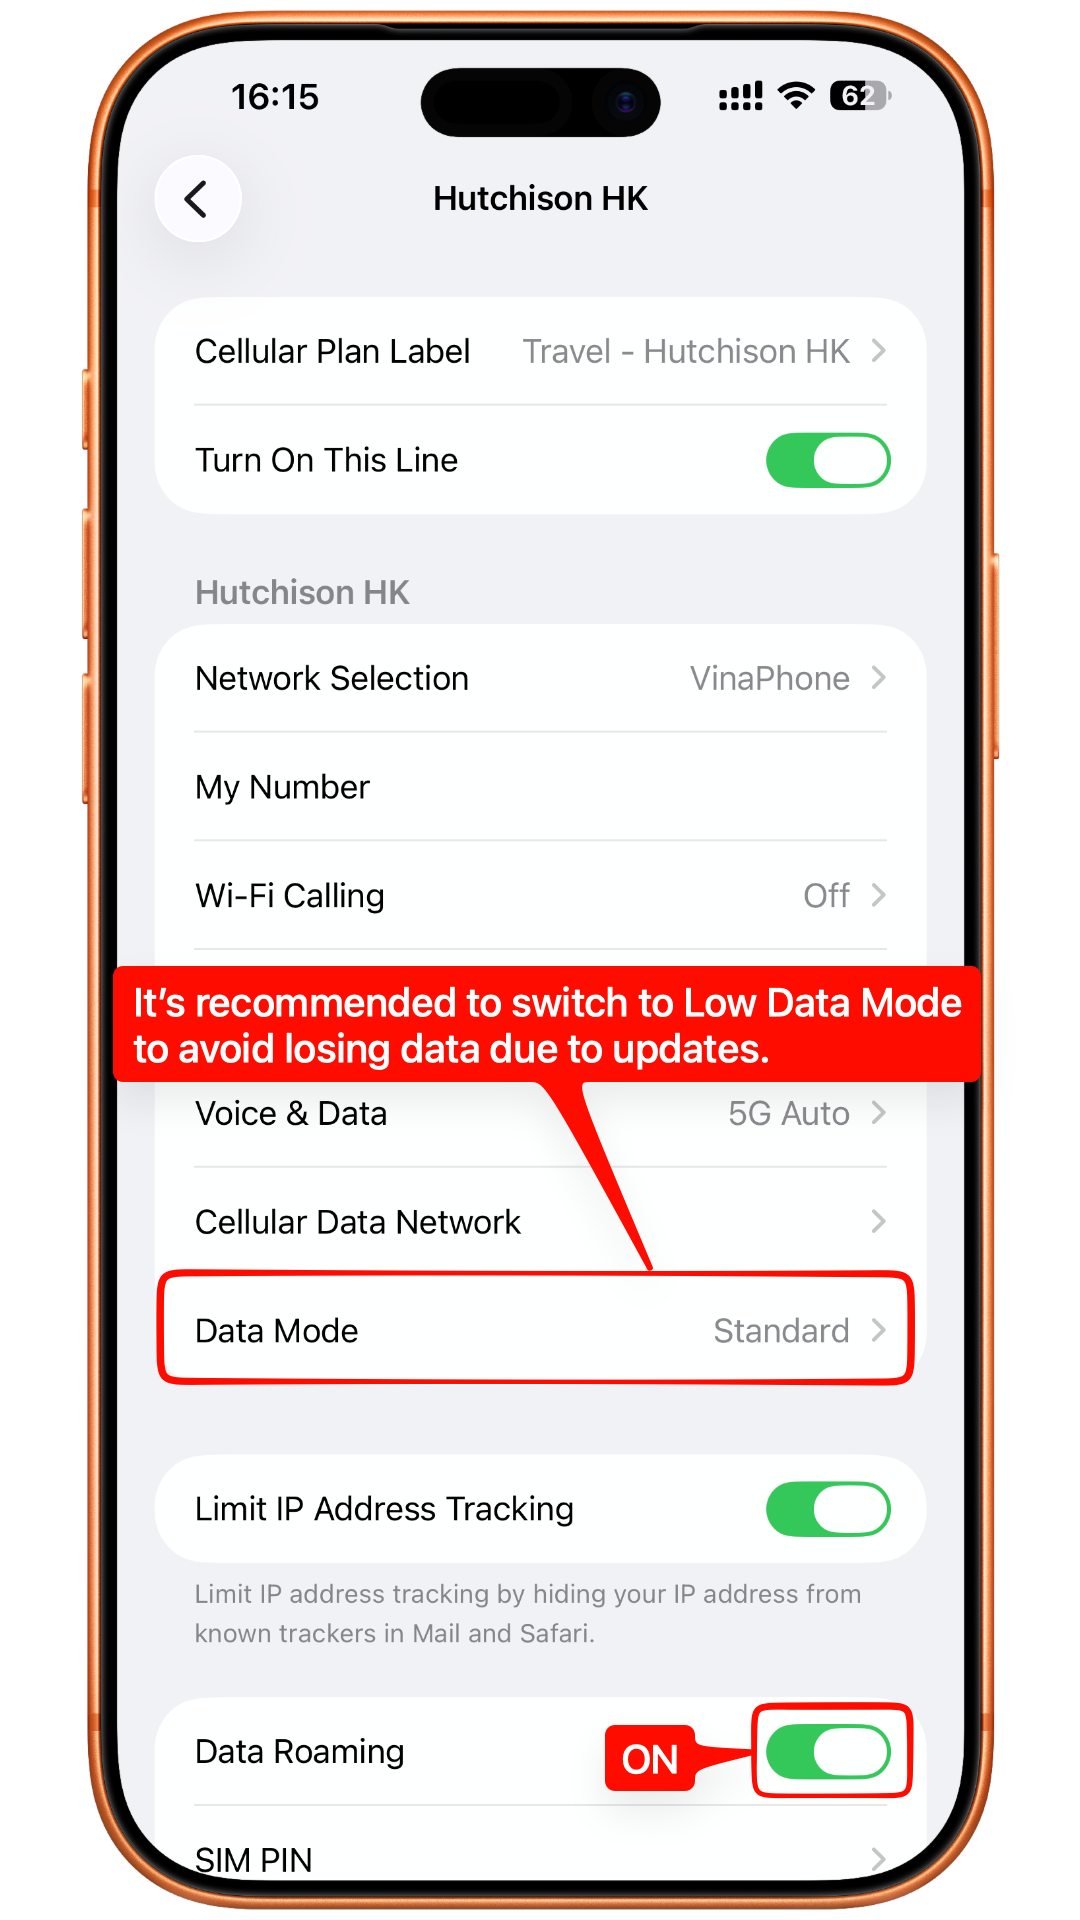
Turn ON Data Roaming
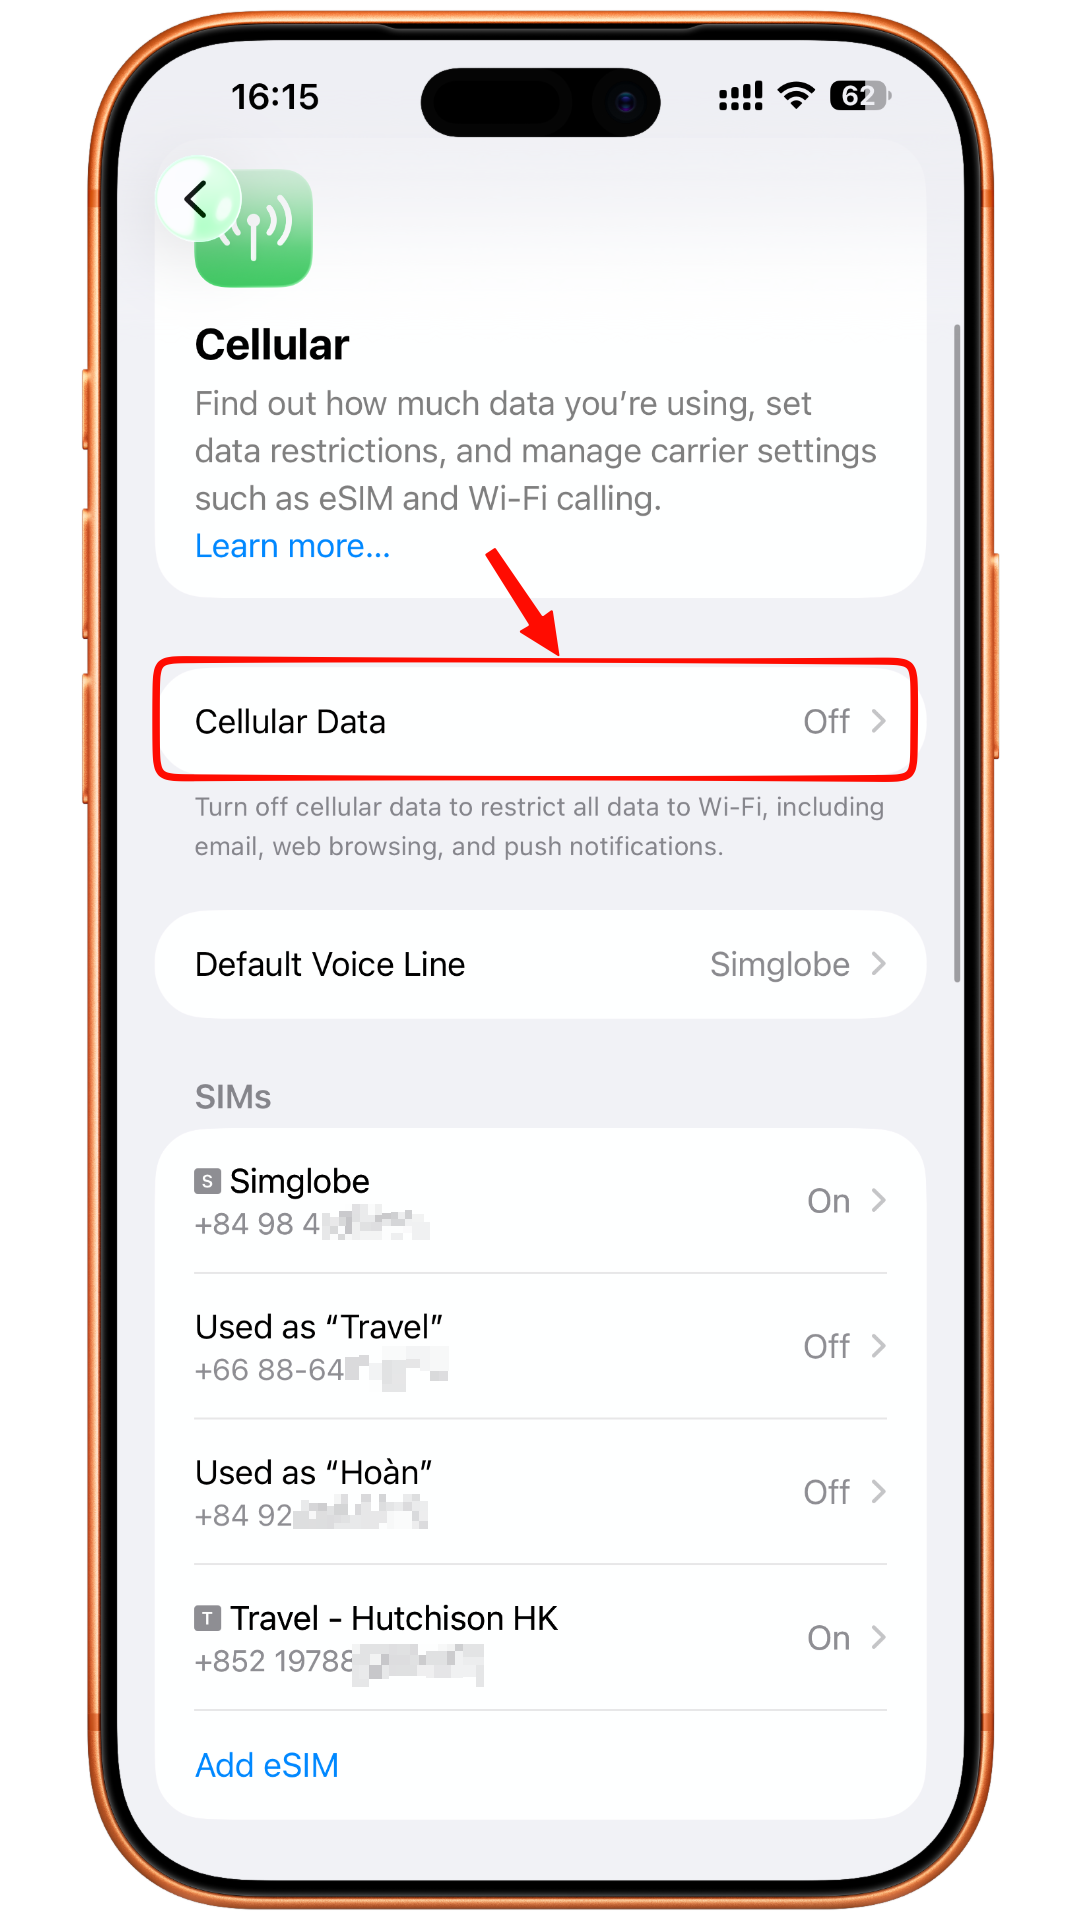
Next, go back to Settings → Cellular (or Mobile Service)
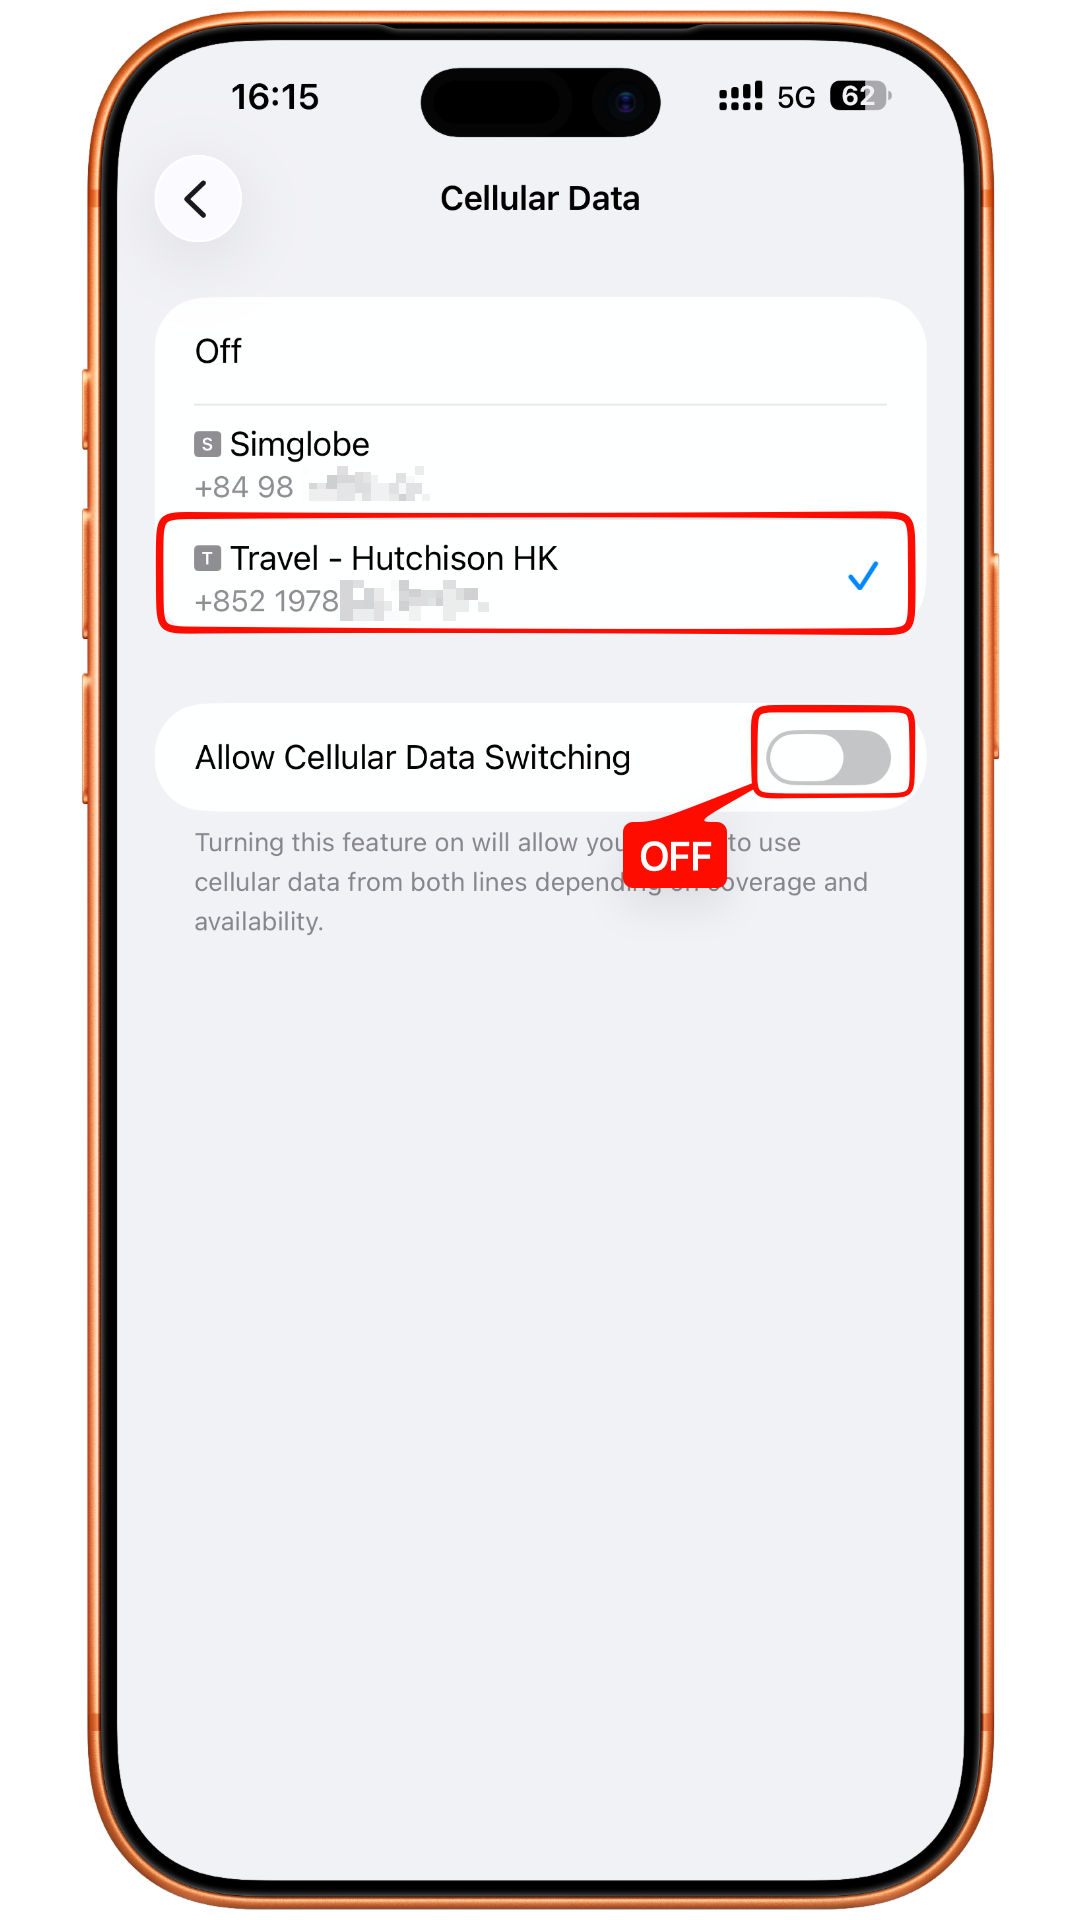
Then tap Cellular Data
Select the new eSIM name; in this example, it is “Travel – Hutchison HK”
Important Notes:
If you encounter any issues during installation, do not repeatedly scan the eSIM QR code.
Please do not delete the eSIM under any circumstances.
Some eSIMs scanned in Vietnam or outside the supported coverage area may remain in Activating status for up to 30 minutes and then display an activation error. Please do not worry, the eSIM should still work normally once you arrive at your destination country.
If you need assistance, please contact customer support for 24/7 support.